Nikon meets diverse inspection needs with X-ray CT system family
The next-generation VOXLS family includes the large-volume VOXLS 40 C 450 that is available now and four medium-sized models coming later in 2023.
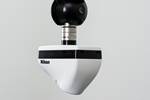
VOXLS 40 C 450 system. Photo Credit, all images: Nikon Metrology
(Brighton, Mich., U.S.) has announced the launch of its next-generation family of X-ray computed tomography (CT) inspection systems called VOXLS (VOlumemetric X-ray Leading Solutions). Designed for diverse inspection needs across automotive, aerospace and academia industries — and likely for use on composite structures —the VOXLS family includes the large-volume VOXLS 40 C 450 that is available now and four medium-sized models coming later this year.
The flagship VOXLS 40 C 450 offers enhanced precision, resolution and scan speed, inspecting items of various sizes and densities. Is distinctive features, such as dual microfocus X-ray sources — one rated at 450 kV for penetrating large or dense parts, and the other at 225 kV for examining smaller components or those of lower density — and Nikon’s exclusive rotating target technology, are said to provide flexible, ultrahigh resolution imaging for a wide range of quality control applications. The single-piece cabinet can accommodate assemblies up to 1,275 mm in diameter × 1,800 mm tall and the scan envelope at 800 mm diameter × 1,415 mm high.
The VOXLS 30 C 225 and VOXLS 30 M 225 are powered by Nikon’s 225 kV microfocus source and Rotating.Target 2.0. These systems are said to excel in shopfloor and R&D environments, inspecting components like additively manufactured metal parts and lithium-ion battery cells. Whereas the VOXLS 30 C 225 has synchronous source and detector movement, the VOXLS 30 M 225 is a bridge-style system with fixed source and detector height. It is designed to be equipped with an internal autoloader for holding multiple samples, so batches of components may be scanned and inspected without operator intervention.
The VOXLS 30 C 450 and VOXLS 30 M 450 offer up to 450 kV of X-ray power for efficiently examining thick and dense samples. The former is ideal for inspecting tall samples such as a large turbine blade, whereas the latter is defined by its ability to be equipped with an internal autoloader for holding multiple samples. Samples may be scanned without operator intervention, freeing up personnel for other duties and facilitating unattended operation overnight and on the weekend, resulting in increased productivity, Nikon Metrology says. Both systems are also compatible with fully automatic, closed-loop inspection at high speed in a quality 4.0 production line environment.
Related Content
-
Schrödinger advances materials informatics for faster development of next-gen composites
Cutting time to market by multiple orders of magnitude, machine learning and physics-based approaches are combined to open new possibilities for innovations in biomaterials, fire-resistant composites, space applications, hydrogen tanks and more.
-
SAM XL demonstrates closed-loop digital methodologies via full-size aerocomposite parts development
PeneloPe Project’s modular, zero-defect manufacturing deliverables are being highlighted in an upcoming video that demonstrates the resulting aerospace pilot line’s feasibility.
-
Aerotech Academy Puglia is inaugurated at Leonardo Aerospace site in Grottaglie, Italy
Joining the Leonardo MaTeRIA Lab and Joint Lab with Syensqo, this aerostructures training course will be 75% materials science and structural design/analysis, 25% digital transformation and AI.


